Tuesday, August 2, 2011

Day 47: Flower Power

Create something using flowers (real or fake). I'm trying to use things I have around the house, so I made animal plant holders and magazine flowers.
My cat eats ALL of my plants and killed off half of this bowl of plants so I added these toy animals.
I stole this idea from Plaid Pigeon, who's designs look amazing compared to my crap but that's acceptable.
I bought the toys from Rite Aid and used my Dremel to make a hole.  Luckily the toys were hollow which saved a lot of trouble.
Succusarous
I also decided I needed to make something with flowers since it was in the title of the project so I found this cool design (which again, I stole) and even found an instructional video.
Here's my version:
magflowers

Monday, August 1, 2011

Day 46: Face Fun

Create something using your face.  I decided to demonstrate the method I used for my Medusa make-up this Halloween.
You need:
  • Fishnets or a net bag (I used a plastic net bag that held cherry tomatoes).
  • Cut out a section of the net and attach it to a "frame".  Take four pieces of cardboard, popsicle sticks, whatever.  The goal here is to stretch out the net.  If you skip this step you will be trying to hold the net in place and stretch it out at the same time without moving.  I was lazy and didn't do that for this pic and it shows.
  • Various shades of green make-up... I would use a yellow and a purple to help highlight/contour.
  • Eyeshadow applicator
Here's a pic of my eye (thrown together as an example)
eye
*smaller shapes using the cherry tomato bag - I like the fishnet affect better.

Instructions:
  1. I suggest using a lid primer, then apply a very light shade of green, white, or yellow across the lid and scoop it around to a bit of your cheekbone.
  2. Set out all of the darker colors have them open and easy to access.
  3. Hold the net up to your lid.  Dip the sponge eyeshadow applicator into a green and tap tap tap all over.
  4. Try not to move the net and keep covering till the green is dark.
  5. Now if you'd like use the purple and tap a winged out shape along the crease of your eye and tap yellow under the arch of your eyebrow.
  6. Pick up the net and bring the shape out onto the cheekbone and into the hair line.  I used mostly purple close to the hair line and took the shadow right onto the hair
  7. I also suggest the Eddie Munster V on the forehead going into the hair line.
If you have creases on your forehead I highly suggest keeping the forehead V very close to the hairline and to avoid shiny shadow.  I looked ten years older and had to redo mine.
Also, purchase that make-up freeze spray.  I'll update this if I can find the name, it may be called a make-up sealant spray.
Here's a picture of me making a gnarly face from Halloween
Dur
*created using fishnets - looks more snake like

Thursday, July 28, 2011

Day 45: Tape

I used tape as a laminate and taped out a frog sculpture by Kate MacDowell from an issue of Hi-Fructose.
I cut out the frog, taped it, cut out in detail, then attached it to a hair clip.
My first couple of thoughts were to either use tape as a stencil for painting or create either a wristband or water bottle band out of tape for jogging with pockets for my car key and money.
But this works and is creepy.
FrogHair

Wednesday, July 27, 2011

Day 44: Light It Up

Create something that lights up (w/ candles, bulbs, etc).
So I decided to come out of the gate with some bad quality pictures. Yeah! Eat it up!
FilmIKEA2
First mistake - using film with ocean pics. Just looks like pictures of static. I was afraid to use film with pics I love and I don't have much left.
Mistake two - never preparing for the project prior. Red votives don't really allow enough light through.
FilmIKEA

I was inspired by this project to do a follow up where I scan my photobooth pics, turn the images in the strip by 90°, print, modge podge around the outside of clear votive holders. Plus I can adjust the transparency of the pics in Photoshop. Bam!! Awesome.

Oh by the way... Materials: Votives, film, tape... yeah tape!

Day 43: Random Projects (string balls, IKEA godzilla hack)

I took a break from daily projects and following the books suggestions.  Here are some of the creations from my hiatus.
GLITTER BALLS
I've been completely obsessed with Pinterest and saw a number of string orbs but most just seemed boring... and then this:
Minedontlookthiscool
*From the site Juicy Bits...*
I used materials I already had: Balloons, cross-stitch thread, glue (mixed with water & corn starch), and confetti.  You'll also need trashbags, string, and something to hang the drying balloons on.
You can find these instructions online anywhere but basically draw a circle around the opening of the balloon and do not cover that section with thread (in case you want to add a light).  Then run the thread through the glue, and this part is important, run your fingers along the string to get off a bit of the excess glue.  I didn't do this for my first two. Wrap wrap wrap, throw confetti, and hang. 
Hanging
Wait overnight, or in my case a few hours because I need immediate gratification for my work.  Popping the balloons was extra festive because it shot a lot of the graffiti all over the room.
I only had a small amount of thread so these are more sparse than I would have liked.

HangingDone
Lessons learned:
  • Next time I'm using yarn or some sort of thicker thread. 
  • As I mentioned run your fingers along the thread wiping away some of the excess glue.  You can see the glue all around the threads of the purple ball but the yellow ball looks great.
Glue

IKEA HACK:
You've all seen the oversized (55 x 40) wall pics at IKEA; I bought the Chicago one years ago and even though it's kind of ugly, now that I live in California it holds some sentimental value.  I decided to enhance the picture... by adding Godzilla and King Kong. 
I measured the buildings and decided on the appropriate size for the creatures.  I found pictures online adjusted their size in a photo edit program and printed them out.
I took a sandwich bag and sharpy and traced the skyline so I could nest the creatures between/behind the buildings.
I taped the sandwich bag to the monster and cut out the monster and the lower half to match the skyline.
In order to make the creatures blend in a bit better I tinted them by adding water and paint to a bowl and dipping the paper.  As mentioned, I'm impatient, so I grabbed a blow dryer and dried them out.
The creatures were attached to the pic using plain ol' glue sticks.
Ikea
It looked better but needed addition flare so I added googly eyes and some red and yellow confetti.
A little closer view:
hack

Last I decided to fill my frame with some of my toys.  I stapled a screen to the frame and used floral wire to hang the toys.  I don't really like it.  I'm thinking maybe a black background might make it look better.
ToyFrame

Day 41 & 42: Think Big & Junk Mail

Day 41: Create a large version of something normally small.  Day 42: Work with Junk Mail.
I created a paper mache flea
Unfortunately I can't remember what recipe I used for the paste but it was basically Water, Elmer's Glue, & Corn Starch.  I used two balloons blown up to two different sizes.
BeforeTheMess
I would love to have captured the pain in the ass process but as soon as you set the thing down the glue wants to adhere to the plastic and trying to clean the glue off of my hands was.... a joy.
Body basically done, now adding legs.  This part was, well, difficult.  I created the legs first then would wrap strips around the leg and onto the body in different directions.
Legs
It's ugly and I love it!  I'm proud of my first attempt at paper mache so I'm leaving it unpainted.
Flea

Day 40: Work with Yarn

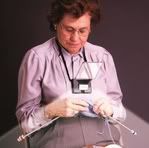
Not a very exciting post but I've always wanted to learn how to knit. I went to "The Little Knittery" and they helped with the yarn and knitting needles. I used a You Tube video to learn the basics.
Knit

Here are my tips for a beginner:
  • Start out with a short row. I almost filled the needle and by the time I was a few rows in, I was a burnt out and my work was pretty unimpressive.
  • Keep it loose. My hands were aching because I pulled the yarn too tight making it hard to pull over or push further down the needle.
  • SexpotMost importantly, unless your boyfriend has a mommy or grandmommy fetish this is not an attractive activity.
"Don't mind me Ryan, I'm just going to sit on the davenport."
"Could you hand me the afghan?"
"How about helping massage this vapo rub onto my chest?" *at this point I would lick my lips and make a kissy face*
He wasn't into it.

Followers